 admin
admin Ways to Fix Brother Printer not Connecting to Wi-Fi Network
Although Brother printers have an amazing wireless facility to boost firms’ productivity, users may sometimes have to face the “Brother Printer not connecting to Wi-Fi” problem. When the Brother Printer fails to connect with wi-fi, it is because outdated drivers, firmware, Poor Network Signals etc.
When the printer loses connection with the wi-fi network, it also stops printing and shows connection error messages.
If you cannot fix the error, please follow our below-mentioned troubleshooting tips.
Steps to fix if Brother Printer won’t Connect to Wi-fi
1. Check The Wireless Internet Connection
If you face hurdles connecting Brother Printer to Wi-Fi, check your wireless internet connectivity.
If the wireless connection status shows weak signals, you are bound to face the “Printer is not connecting with Wi-Fi” issue.
In case you need to be provided with good internet connectivity, contact your internet service provider for this.
Besides checking the wireless connection, ensure ethernet cables and router are connected appropriately. If cables are damaged, it will interrupt the connection.
Moreover, if you are sure there is nothing wrong with the wireless connection & everything is perfect, then there may be some issues with the printer. Hence, check our next solution.
2. Power Cycle Your Device To Fix Issues
Power cycling the device is another best way to give your hardware a new or fresh start. As a result, various issues will be fixed automatically.
After you power cycle your router, PC, and printer, it will fix various connectivity issues surely.
Therefore, you need to check the steps below to power cycle your device:-
- Primarily, power on your Brother printer.
- In the next step, click “Menu Key” on your printer.
- Through the “Up and Down” keys of your printer, you will find the “Network” option.
- Now, press the “Next” button.
- After that, find and click on the “Network Reset” button.
- Next, either press “Yes” or “1”.
- After finishing the reset process, connect to Wi-Fi again.
3. Update Your Brother Printer Drivers
If your Brother Printer fails to connect with your Wi-Fi network even after following the above tips, consider updating drivers.
When the drivers are incompatible with the operating system and printer, it shows connection errors. Now, the time has come to update the drivers.
Keeping the printer drivers up-to-date is mandatory to make the device function according to users’ requirements.
So, visit Brother’s official website to download and install the drivers according to model number and printer needs.
Furthermore, you can also make your PC install the drivers automatically by altering some settings in the device manager.
- To begin with, go to “Control Panel.”
- After that, choose the “Hardware & Sound” option.
- Now, click on the “Device Manager” option.
- Then, in the device manager windows, choose “Printer” and right-click “Brother Printer.” Select “Update Driver.”
- Afterward, proceed with the option “search for the updated drivers automatically” option.
- Here, permit your PC to find and install drivers for your printer.
- Once the driver file is downloaded, run it & finish the setup.
- Ultimately, reboot the PC and the printer.
4. WLAN Report Helps To Find & Fix Problems
Here in this tip, we suggest you use a WLAN report to show the error code with causes and solutions. You can uAll Postsse the WLAN report on the printer.
To print the WLAN report, check the steps given here:-
- First, go to the “Settings” of your Brother printer.
- Then, choose “WLAN” reports. Check the “Black Start” or “Start” option.
- Now, check the report, which is also a connection status. If it shows the connection status as “OK,” it simply means it is ready to go further. Otherwise, you would receive a “failed” message.
5. Error Codes with Solutions
- TS-01 – Wireless setting not activated
Solution – Alter Printer’s network interface to “ON.”
- TS-02: Wireless access not detected
Solution – To fix this, power cycle your router, update drivers, reinstall drivers, & reconfirmation of SSID & network key.
- TS-03: Network or Security setting incorrect
Solution – Reconfirmation of SSID and Network key.
- TS-04: Authentication/ Encryption not Supported
Solution – Make alterations in authentication & encryption techniques settings.
- TS-05: SSID/ Network key mismatch
Solution – Again, confirm SSID and network key to resolve the error.
- TS-06: Incorrect wireless security information input
Solution – Confirm & Check wireless security information regarding SSID and Network Key and the Authentication/Encryption techniques.
- TS-07: Cannot check WLAN access with WPS enabled
Solution – Check the connection technique on the access point when using a WPS connection.
- TS-08: Two or more WLAN Access Points with WPS detected
Solution – To fix it, confirm one dedicated access that comes in the range of a printer and is active with WPS.
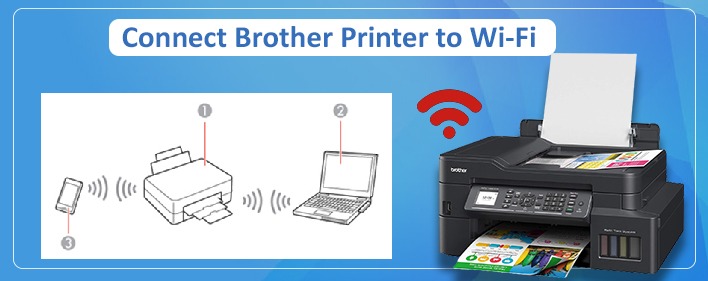
How we can Connect Brother Printer to Wi-Fi
1. Locate Wi-Fi Settings
Discover your SSID or name and password of your Wi-Fi network & check your Wi-Fi router to get these details.
2. Brother Printer Wi-Fi Setup
Should enable the wireless network interface on your printing device. For this, go to “Network” and choose “WLAN.”
Go to “Setup Wizard,” available under the WLAN menu.
After this, it will show available networks. Choose your network and provide the password if asked.
If everything goes well, you will receive a “Connected” message.
3. Download and Install Brother Printer Drivers
Your device must have updated drivers; if drivers are corrupt or missing, you will encounter various printing problems. Before you connect your printer to Wi-Fi, install the latest drivers.
4. Establish Connection Through WPS
Connecting via WPS will not require you to enter an SSID and password or network key. For this, make sure you use a printer compatible with WPS and routers.
2 Ways For WPS connection:-
- Push Button Method
Choose the “WPS” button under “WLAN.” Now, hit the “Push” button and then the “WPS” button available on the Wi-Fi router. After that, wait for some time until the devices are synced.
- PIN Method
Under the “WPS” option, choose the “PIN” option and then type the WPS pin on your router.
Conclusion
Take ultimate guidance from Brother Printer Support if the abovementioned troubleshooting tips don’t help you.
Category:
Brother Printer